
Checking the main bearing clearances is a little tricky on these old 6's. Shims are used under the main caps to achieve the desired clearance. I had been warned to keep the main bearing clearances tight to promote proper oil pressure to the lifters. The main clearances came in at .0018 -.0020 with the shims. Look closely on the edge of the center main caps and you can see the copper colored shims.

The crank nose was drilled and tapped for a small block Chevy balancer retaining bolt and the camshaft was degreed to 3 degrees advanced using an offset key. The Felpro gasket set also included a neoprene rear main seal to replace the old rope seal. Much better leakage prevention with the neoprene unit and much less drag on the crank. Here's the block with crank, cam, rods & pistons and oil pump installed.

These old 6's used an external oil filter system that didn't filter all the oil. A little research on the internet produced an article on how to modify the block for full flow filtering. I was a little apprehensive about drilling holes in the side of the block but I did it and it worked! http://www.stovebolt.com/techtips/full_pressure.htm
The cylinder head prep was a lengthy process. The exhaust valves were replaced with stainless ones and new seats were installed to allow running unleaded fuel. (this modification had previously been done on the 216 already in the car). In order to boost compression, Clifford Performance recommends cutting .100" off the head surface and sinking the intake valve that same .100". They also suggest cutting .100" off the valve stem. Take a look at the combustion chamber for this head and you can see why.
 |
The 54 head had a some light porting done in the intake area to round the area below the valve a bit. New valve seals were installed and the Comp Cams springs were installed at the specified 1.700" height. The head was then set on the block and the rocker shafts were installed to check for valve to piston clearance. In order to achieve proper cam lift and valve to piston clearance, .100" shims were added under the rocker stands and .080" lash caps were added on top of the exhaust valves. Here's the head installed and the rocker shafts just sitting in place. You can also see the new holes for the oiling system on the lower side of the block along the oil galley ridges. These will be clearer in a later picture.

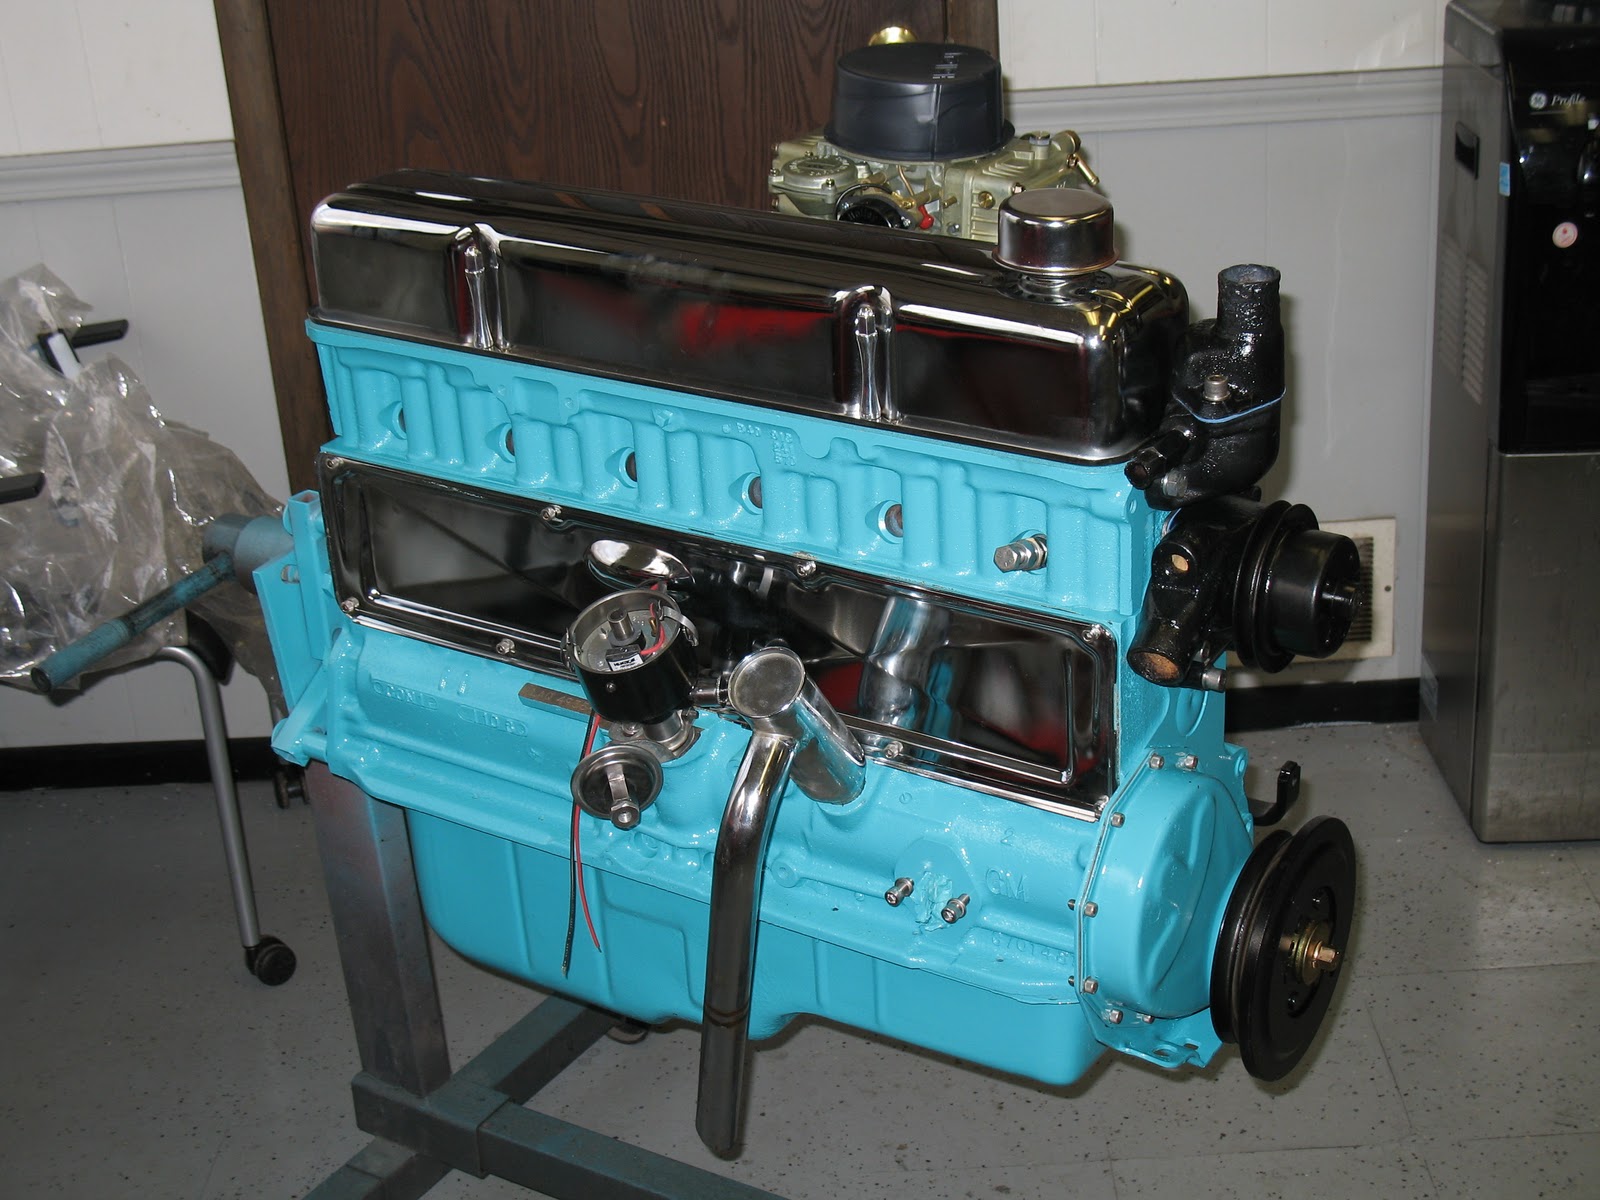
Once the valve train was finalized and the block was masked it was off to the paint booth to add some color. Here's the before and after pics.


Next it was off to the dyno room to break in the camshaft and see how much HP the little 6 could produce. In stock form, the '53 was rated at 115hp with a single barrel carb. I was expecting somewhere in the range of 175 - 180 hp on the new motor.


Note the timing pointer and oil filter system in the top pic. One of the things stressed by all the old timers is heating the bottom of the intake under the carb to prevent stumbling and poor gasoline atomization. We ran a temp probe right under the carb during the dyno time and the old timers are right! The temp drops a lot when the throttle is opened. Note the water hoses running from the block to the intake and from the thermostat housing to the intake. Dick added a fitting in the thermostat housing for the hose connection. These pics were made prior to running during the initial setup. It was late in the afternoon before we finished the setup and got it running. When the lower water hose blew off the water pump giving Duane and I a warm bath, we figured that was enough for the first day. Little did we know, that was just the beginning of several more issues to follow.
No comments:
Post a Comment